How to fit a filter to your Polaroid SX‑70.
The filter sits on the film cartridge, not the camera. There is no glue, no drilling and nothing permanent. If you change your mind, it lifts straight back off and the camera is exactly as it was.

Will it fit my camera?
Because the filter goes on the film pack rather than inside the camera, fit is far less fussy than people expect.
- ND & Extra Bright NDFolding SX‑70 bodies: Alpha, Model 1, Model 2, Model 3 and the Sonar/SE.
- DuochromeThe same SX‑70 bodies, plus modern Polaroid 600 cameras like the OneStep and Sun 660.

Look for the green stamp.
Everything ships USPS in a plain letter envelope, so it comes with your post rather than as a parcel. Look for the green Polaroid camera stamp on the front. That is how you’ll pick it out from the rest of the post.
- Your filter, kept flat between two pieces of card so it can’t crease
- A printed instruction sheet
- Free shipping within the US, or a $2.50 flat rate internationally
- Tracking on domestic orders. International orders aren’t tracked.
Four steps, about a minute.
This is the same instruction sheet that ships in every order. Work in normal room light. The darkslide is still protecting the film.
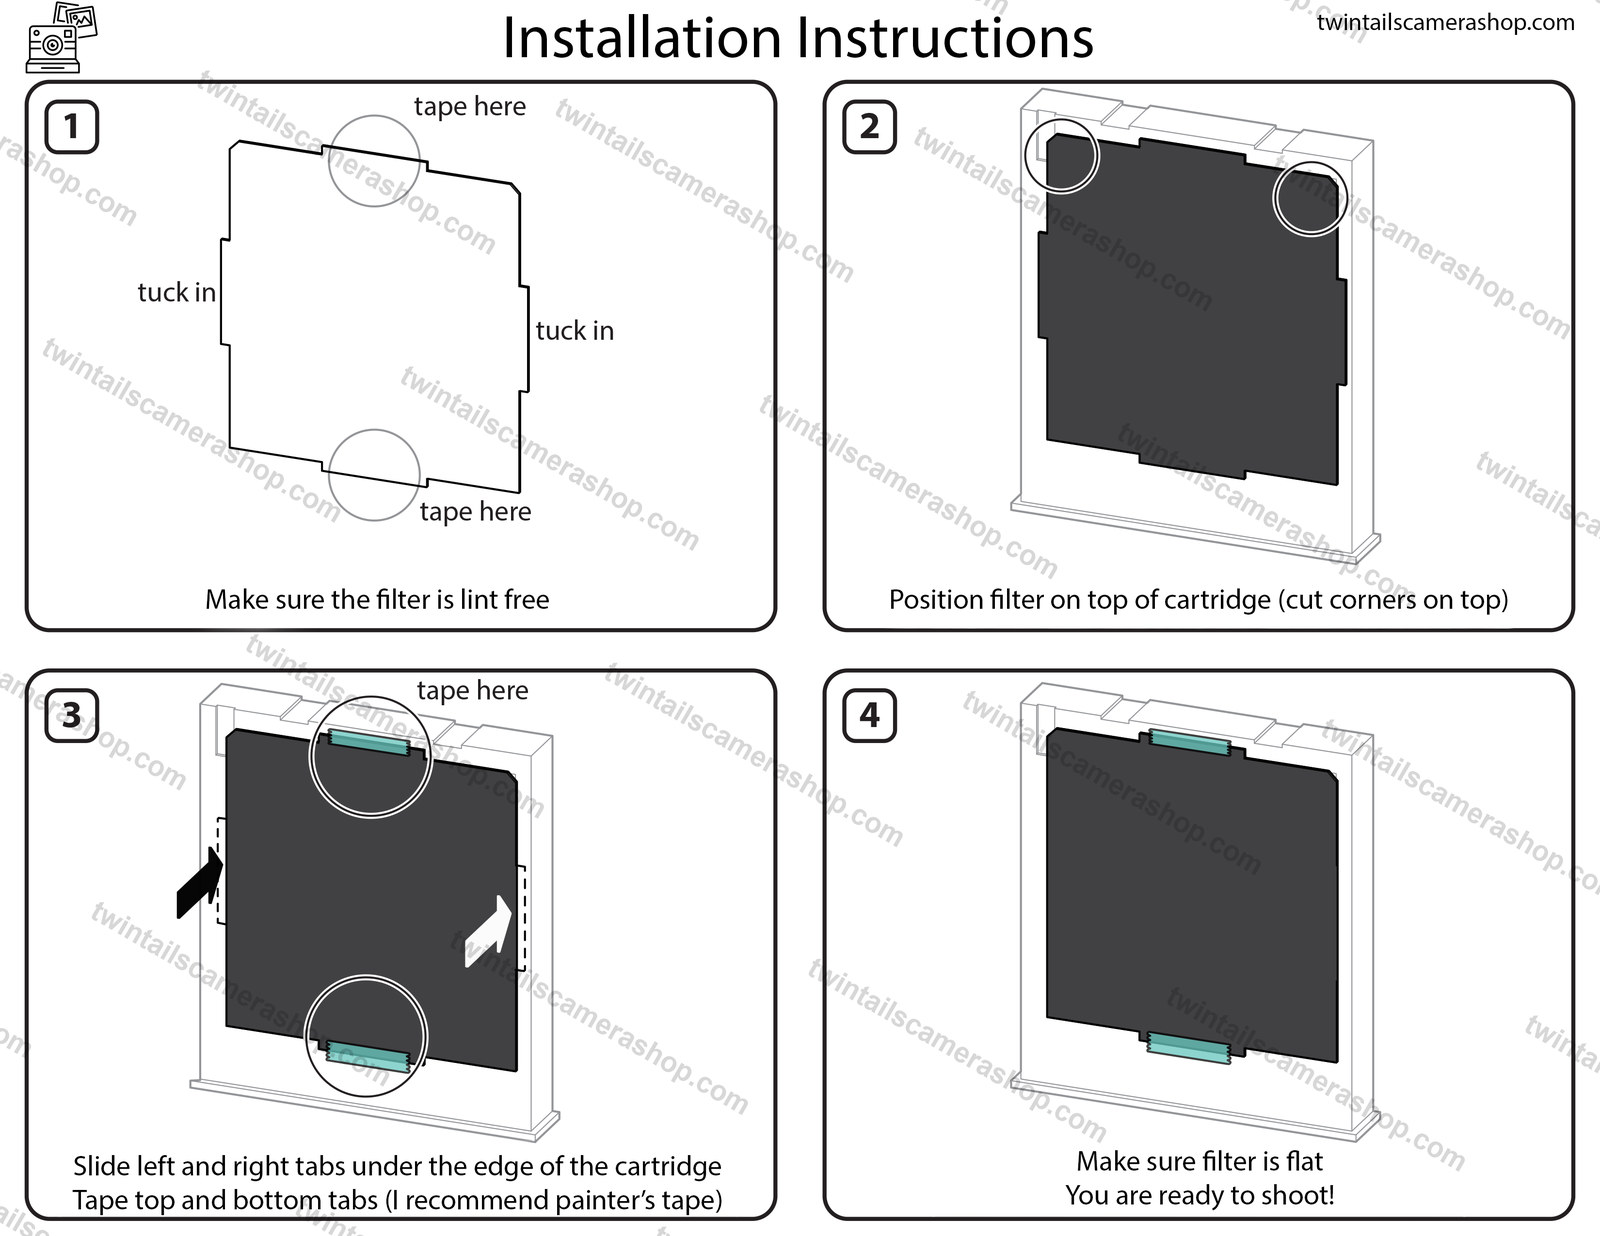
Check it’s lint free
Take the filter out and make sure it’s clean and free of lint. Anything sitting on the surface is right in the light path.
Position it on the cartridge
Lay the filter on top of a fresh Polaroid 600 cartridge with the cut corners at the top. The notches line up with the cartridge.
Tuck the sides, tape the ends
Slide the left and right tabs under the edge of the cartridge, then tape the top and bottom tabs down. Painter’s tape is recommended.
Check it’s flat, then shoot
Make sure the filter is sitting completely flat, load the pack into your camera as normal, and you’re ready to shoot.

Taped at the ends, flat as a pane.
A correctly fitted filter sits flush against the cartridge, taped at the top and bottom, with nothing bunched over the cut‑outs. A loose filter is shown alongside for comparison.
Which way to turn the exposure dial.
The two filters want opposite settings, so here is the short answer for each.
Leave the dial centered.
An ND filter does the correcting for you. It cuts the light so 600 film behaves like the ISO 160 film your SX‑70 expects. Left where it is, the camera meters exactly as it was designed to.
Dial → centerTurn the dial towards brighter.
Color gels absorb light as a side effect of shifting the color, so you need to give some back. Darker colors like Dark Blue, Magenta and Primary Red want bright daylight or a flash to really sing.
Dial → brighterTroubleshooting.
Shots are still too bright+
Shots are coming out too dark indoors+
My Duochrome shots are very dark+
There are faint marks on the filter+
The film is jamming or ejecting oddly+
Can I move it to another pack?+
Still have a question? Just ask.
Every filter is cut to fit here in Seattle, and messages come straight to us. Send a photo of your camera or your shots on Etsy and we’ll tell you what’s going on.